Add a client
Create a client record with the tax, contact and address details Bilify prints on every document you issue to them.
A client is a company or person you issue documents to. Once a client is saved you can pick them on any offer or invoice, and Bilify copies their details onto the document when you issue it.
Create the client
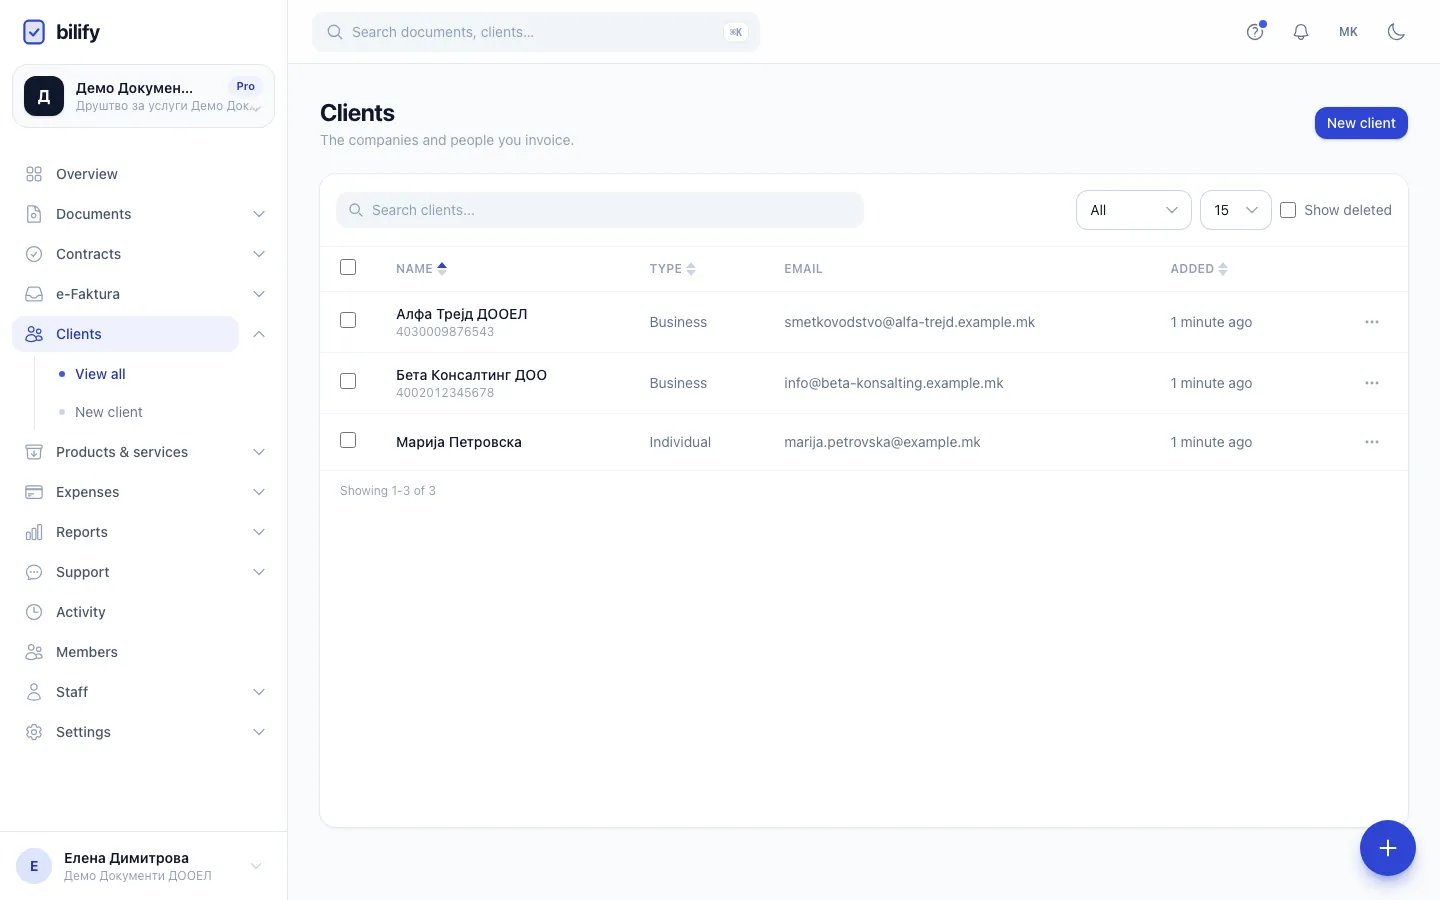
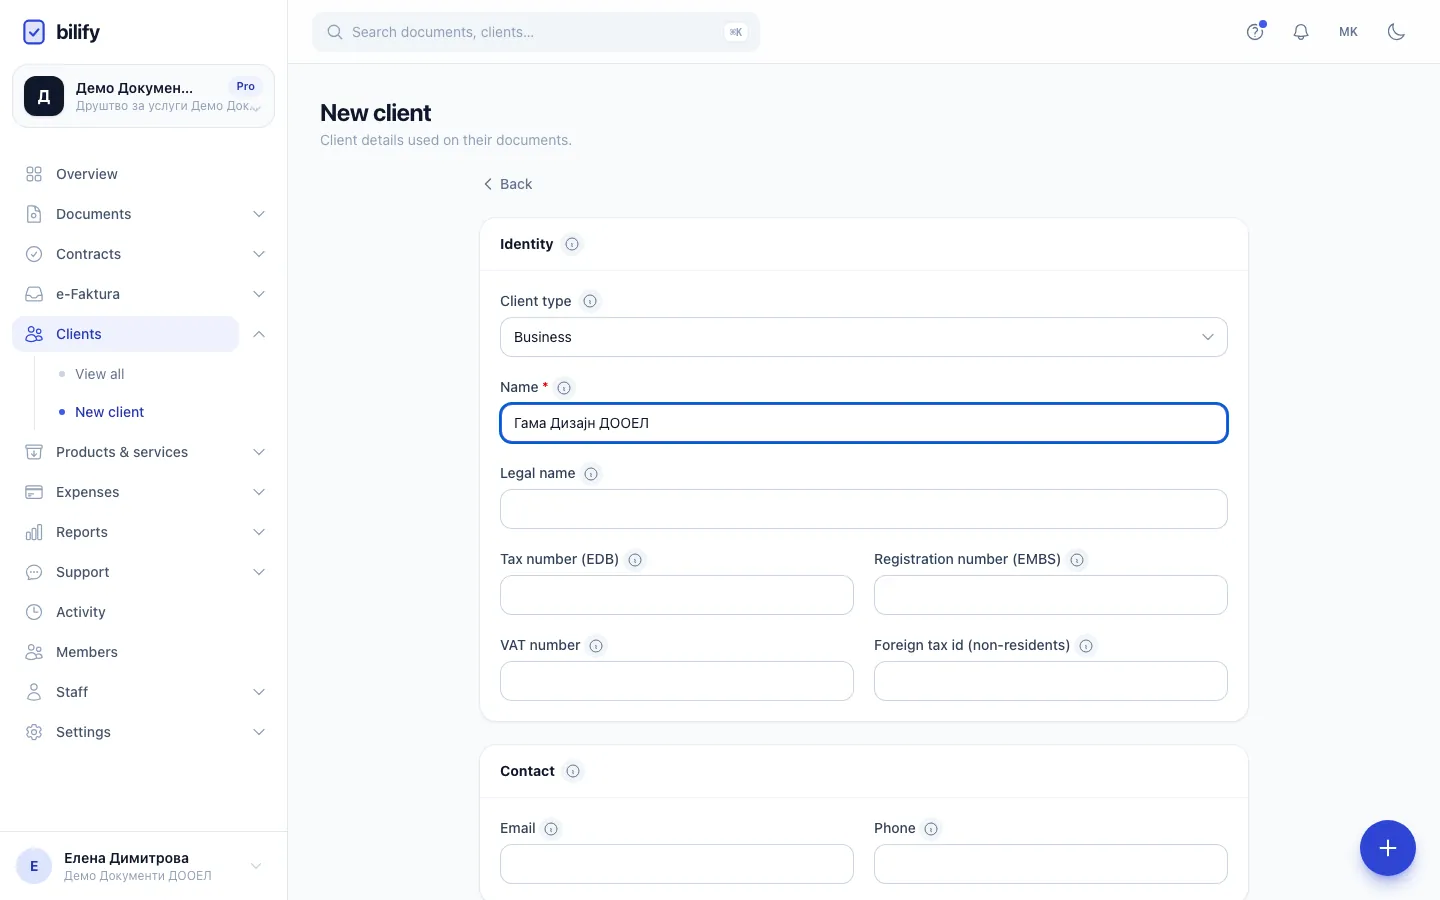
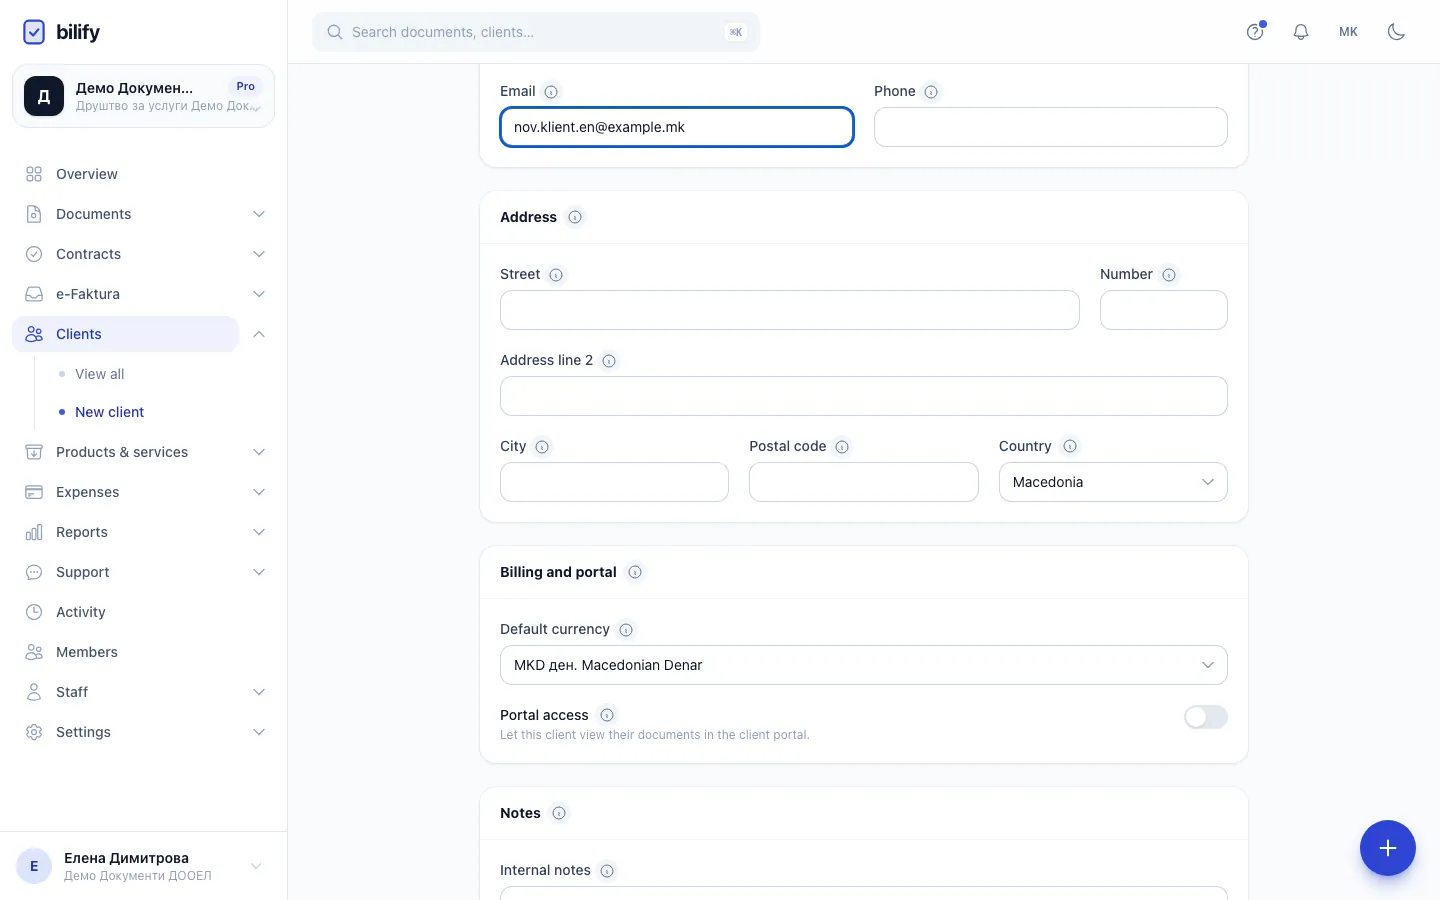
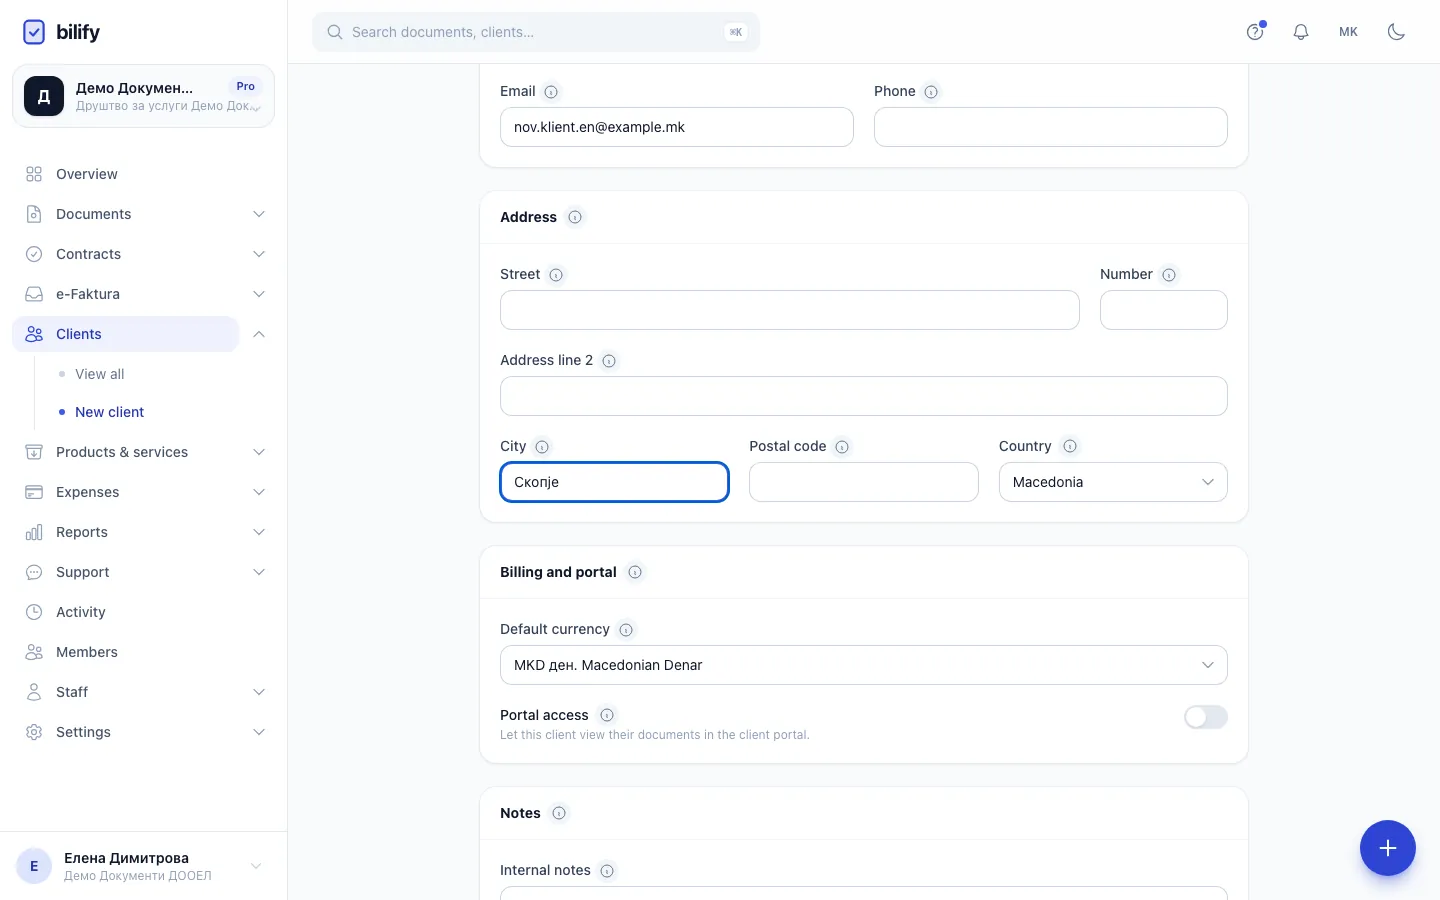
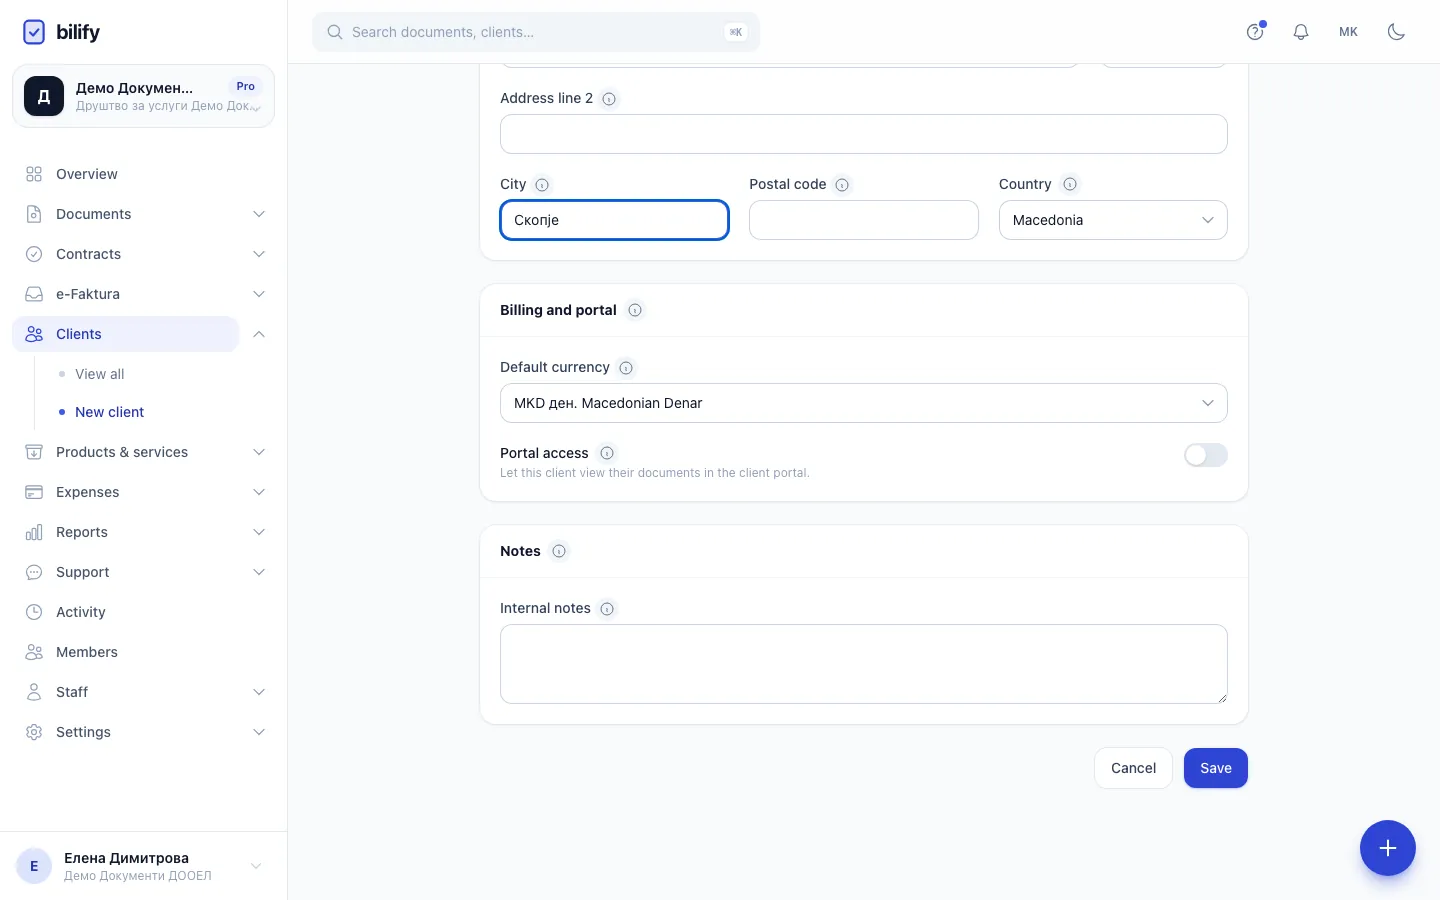
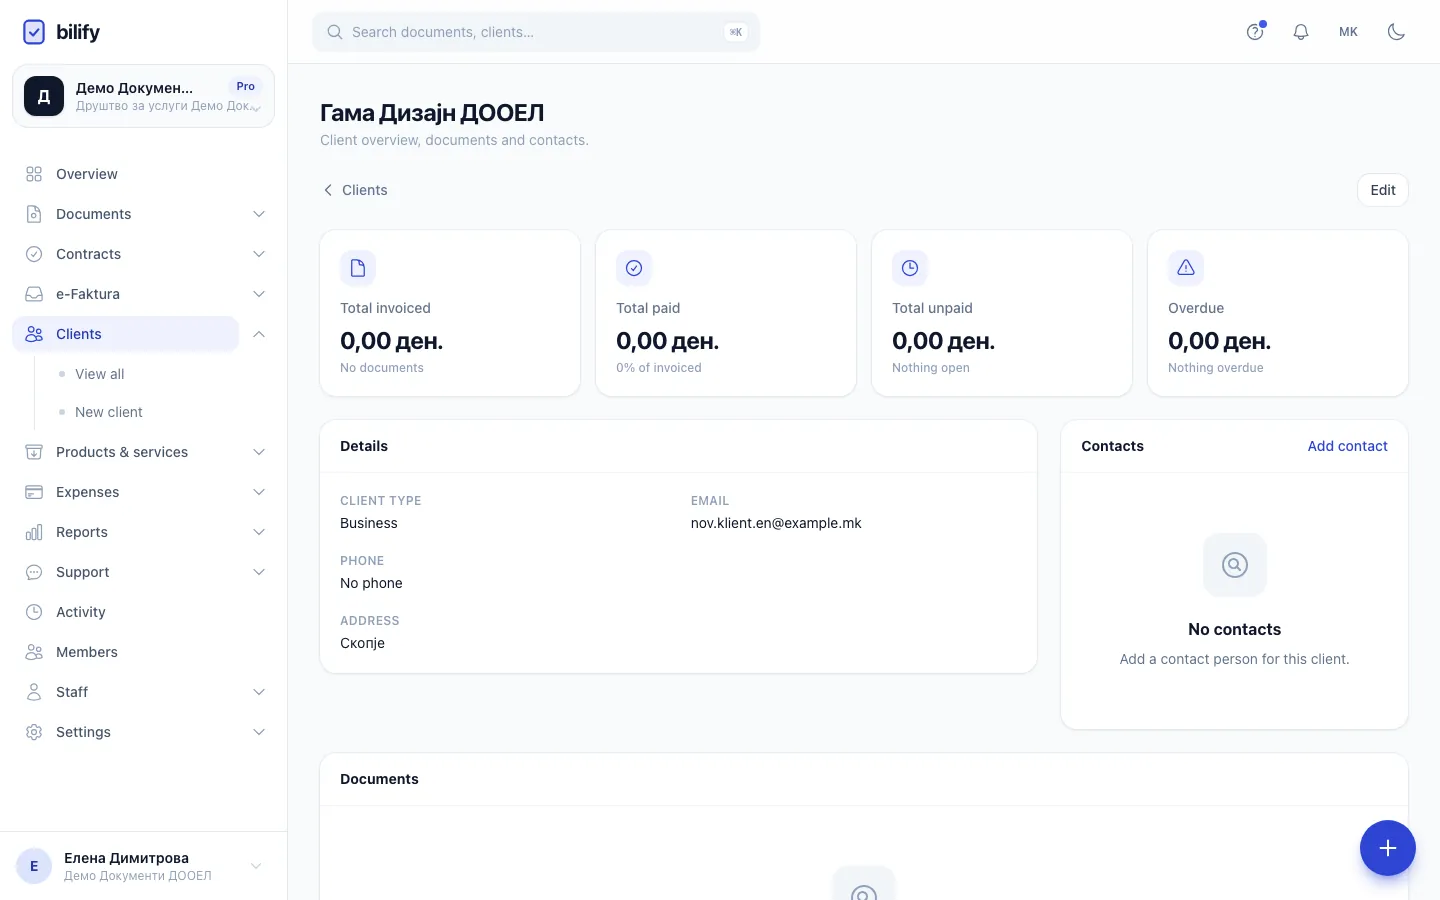
- Step 1: Open Clients and click New client to start a new client record.
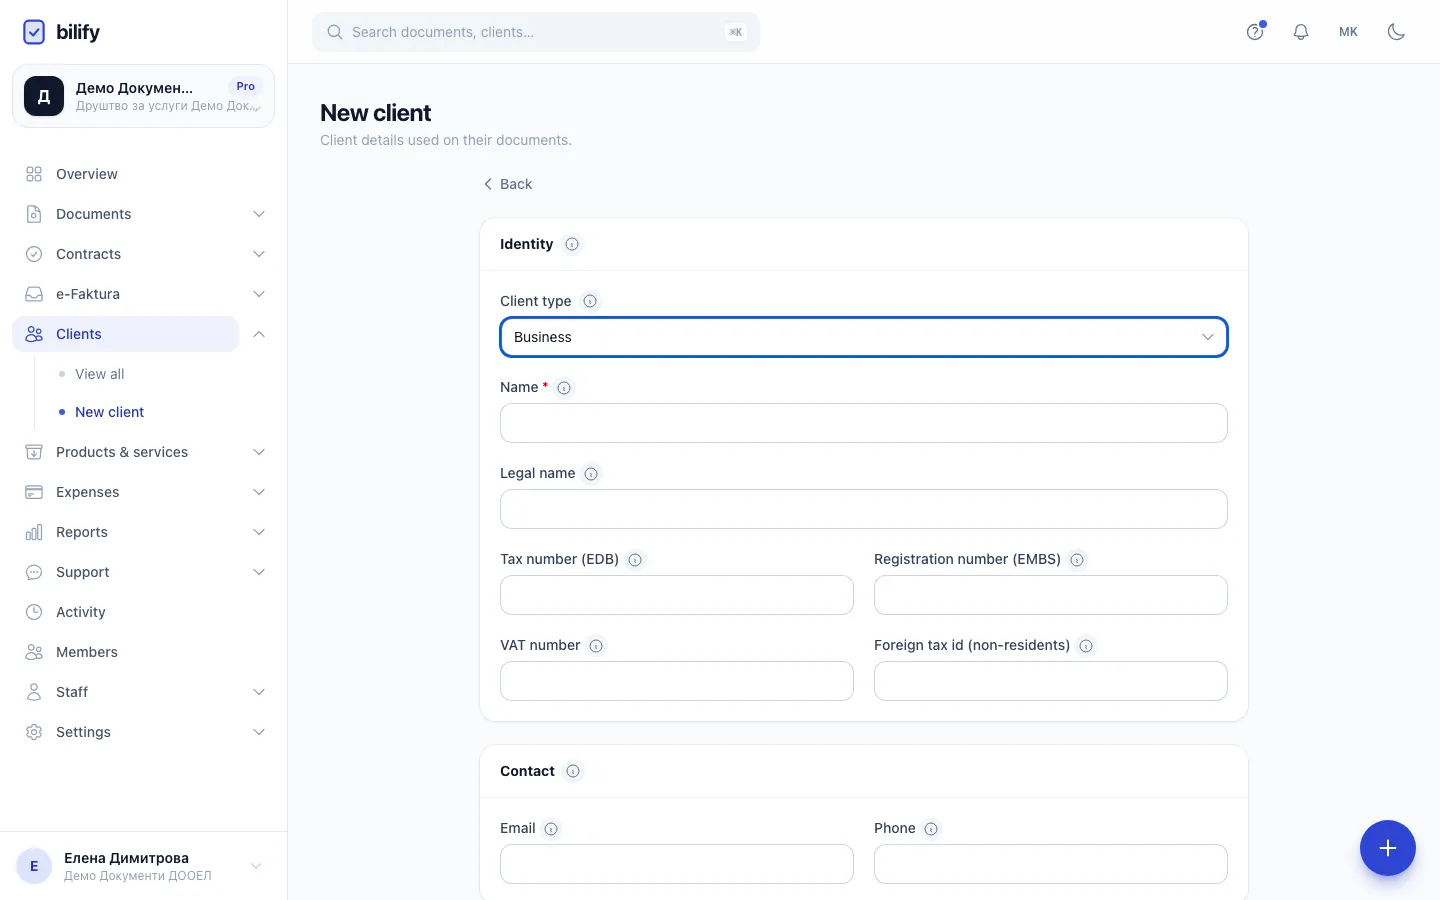
- Step 2: Choose Business for a company or Individual for a private person.
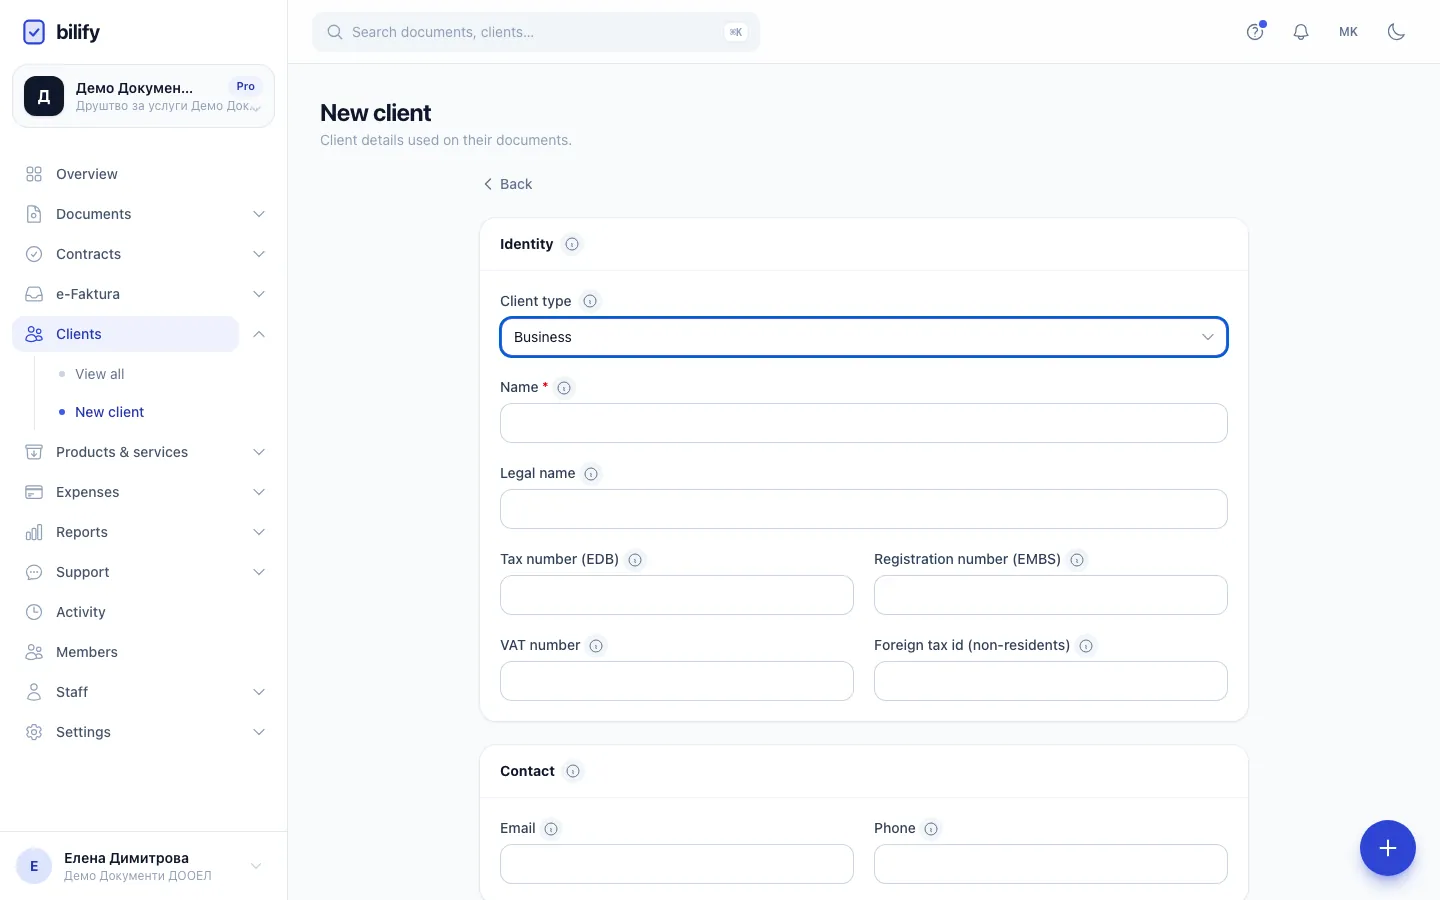
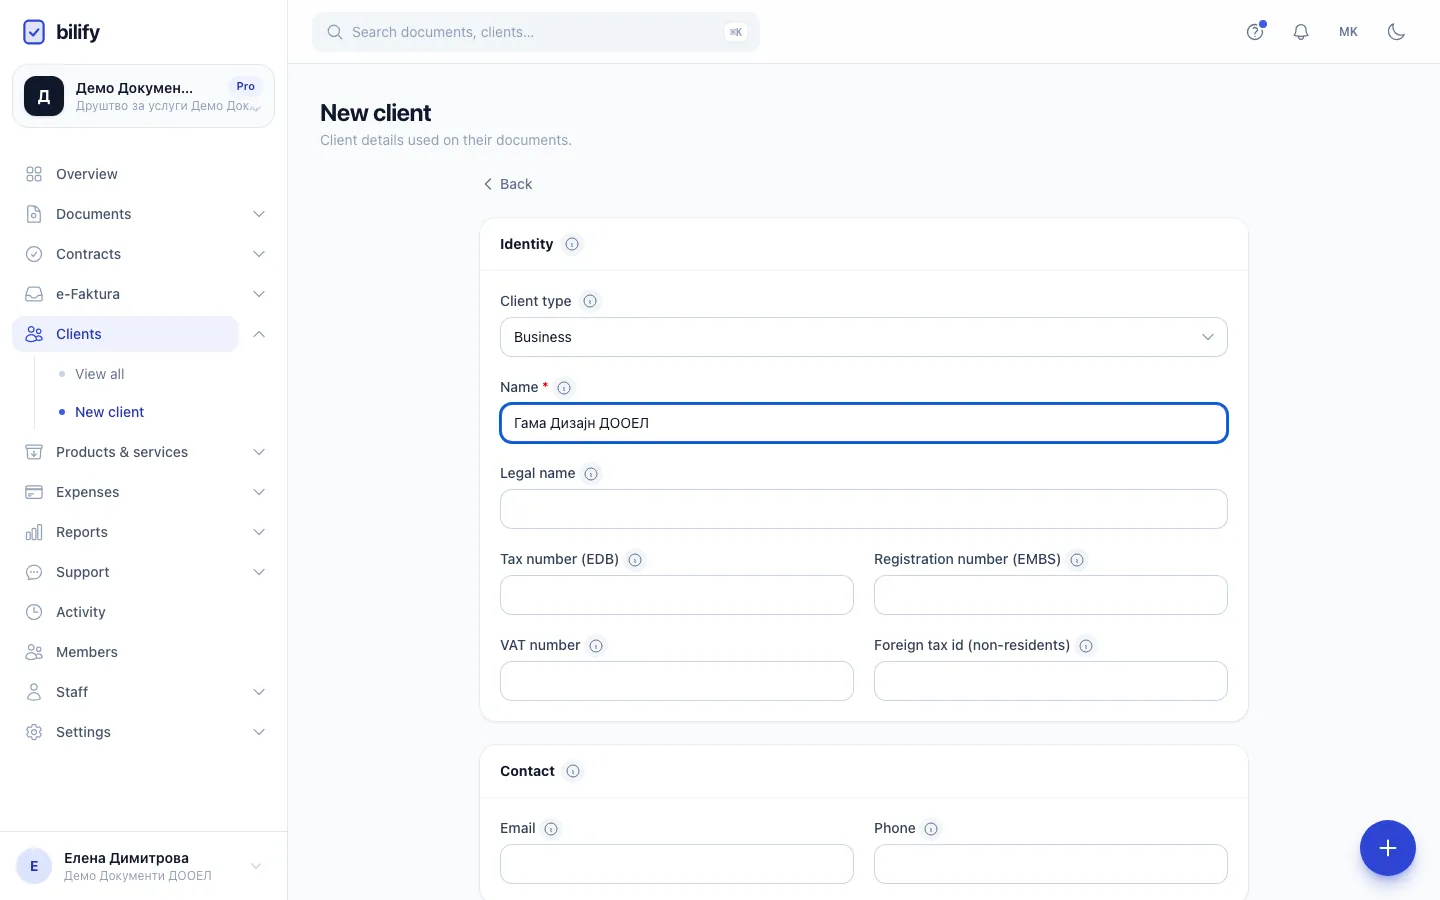
- Step 3: Enter the client's name. It is the only required field.
- Step 4: Add the tax number (EDB) and registration number (EMBS) for business clients.
- Step 5: Add the email address documents should go to.
- Step 6: Fill in the address. It is printed on every document you issue to this client.
- Step 7: Optionally set a default currency and switch on portal access.
- Step 8: Click Save. The new client's profile opens.
- Step 9: Add contact people here. The primary contact receives document emails.
- Open Clients in the sidebar and click New client.
- Under Identity, choose the Client type: Business for a company, Individual for a private person.
- Enter the Name. This is the only required field. Add the Legal name if the registered name differs from the name you use day to day.
- Fill in the Tax number (EDB) and the Registration number (EMBS) for business clients. Depending on your company's country, you may also see VAT number and Foreign tax id (non-residents).
- Under Contact, add the client's Email and Phone.
- Under Address, enter the street, City, Postal code and Country. Macedonian companies get separate Street and Number fields.
- Under Billing and portal, optionally set a Default currency and switch on Portal access (see Give a client portal access).
- Add any Internal notes. Clients never see these.
- Click Save. Bilify opens the new client's profile.
The country is pre-filled with your company's country, and Default currency starts at your company's currency.
Duplicate checks
Two clients in the same company cannot share a Tax number (EDB) or an Email. If you get a "has already been taken" error, the client probably exists already. Search for them under Clients, including deleted ones (tick Show deleted).
Add a client without leaving an invoice
When you are already writing a document, click the + button next to the Client field. A small New client window asks only for the Client type and Name. Click Create and the client is selected on the draft straight away. Fill in the tax number and address later from the client's profile, before you issue: Bilify copies the client's details at the moment of issue, not later.
Complete the details before you issue
An issued document keeps a frozen copy of the client's name, tax number and address. If you correct a client's address after issuing, the change appears on new documents only. Existing issued documents stay as they were.
Plan limits
Each package allows a certain number of clients. When you reach it, saving a new client shows "You have reached your plan's client limit". Editing existing clients is never blocked. See Usage limits.
Edit a client
Open the client and click Edit, or use Edit in the row menu on the Clients list. The same form opens with the current details. Changes apply to drafts and future documents, not to documents you have already issued.
Was this page helpful?
Related articles
Still stuck?
Write to us and we will get back to you within one working day.